Windows Environment Setup Guide
This guide walks you through setting up a Windows machine for Corva front-end app development — from installing the required tooling to scaffolding your first app and running it locally.
Step 1: Install Node.js via NVM for Windows
Corva's front-end tooling requires Node.js 24. The recommended way to manage Node versions on Windows is NVM for Windows.
Why NVM?
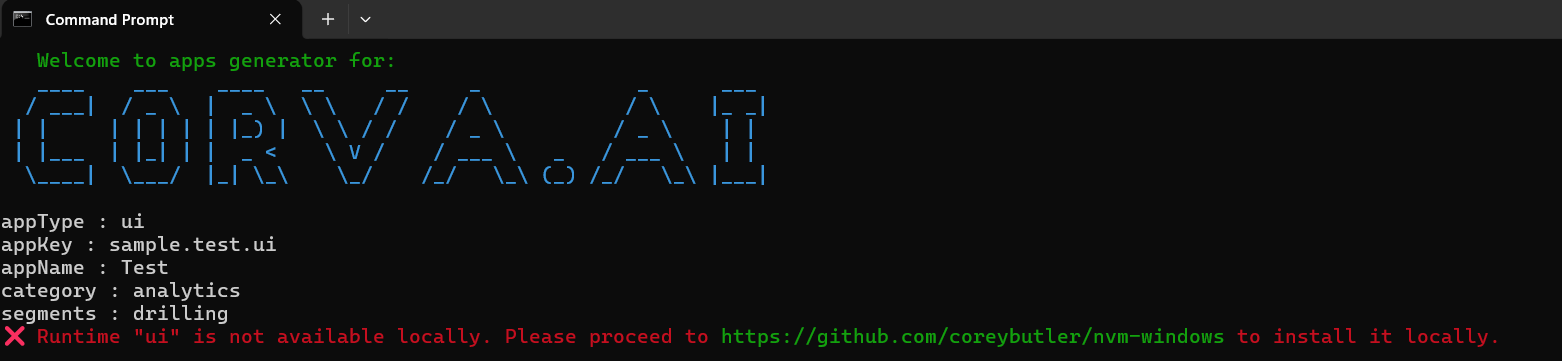
Installing Node.js directly (especially versions above 24) can cause the Corva CLI to fail with:
Runtime "ui" is not available locally. Please proceed to [link] to install it locally.
Using NVM lets you install and switch between Node versions without conflicts.
Install NVM for Windows
If you already have Node.js installed, uninstall it first via Settings > Apps > Installed apps. This prevents PATH and
node.execonflicts later.Download nvm-setup.exe from the nvm-windows releases page and run the installer. Follow the prompts until complete.
Open Command Prompt (
cmd.exe). NVM commands may not work reliably in PowerShell, socmd.exeis recommended for NVM operations.Install and activate Node 24:
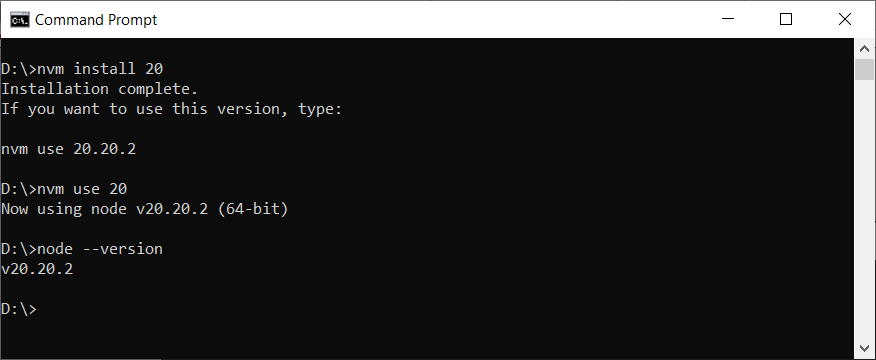
nvm install 24
nvm use 24
- Verify the installation:
node --version
# Expected output: v24.x.x
Step 2: Install Yarn
Install Yarn globally using npm:
npm install --global yarn
PowerShell execution policy
If you use PowerShell as your day-to-day terminal, it blocks global Yarn commands by default. Run the following once to allow them:
Set-ExecutionPolicy -Scope CurrentUser -ExecutionPolicy RemoteSigned -Force
This only affects your user account and does not compromise system security.
Verify:
yarn -v
Step 3: Update the Hosts File
Corva's local development server runs on app.local.corva.ai. You need to point that hostname to your machine by editing the Windows hosts file.
Search for Notepad in the Start menu, right-click it, and select Run as administrator.
Go to File > Open and navigate to:
C:\Windows\System32\drivers\etc
Change the file-type filter to All Files (*.*), then open the file named
hosts.Add the following line at the end of the file:
127.0.0.1 app.local.corva.ai
- Save the file (File > Save) and close Notepad.
Step 4: Scaffold a New Front-End App
Create the app in the Dev Center
- Log in to Corva and open the Dev Center.
- Click Add New App > Front End.
- Fill in the app name, segment, and category, then proceed through the wizard.
- The wizard will display two CLI commands: one to install the Corva CLI tool and one to scaffold your project. Since we already installed Node and npm in Step 1, you only need the scaffolding command —
npxwill download@corva/create-appautomatically.
Run the scaffolding command
Copy the npx @corva/create-app ... command from the App Wizard and run it in your terminal. For example:
npx @corva/create-app my-app \
  --appName "My App" \
  --segments "drilling" \
  --category "analytics" \
  --appKey "your-company.my_app.ui" \
  --appType "ui" \
  --runtime "ui"
If the CLI prints a message saying your version of @corva/create-app is outdated, update it first with
npm i -g @corva/create-app@latest
command and then rerun the npx @corva/create-app my-app.
Select the programming language (JavaScript or TypeScript) when prompted. The CLI will generate a ready-to-use project folder.
Step 5: Install Dependencies and Start the App
Navigate into the newly created project directory and install dependencies with Yarn:
cd my-app
yarn install
Then start the development server:
yarn start
Your browser should open automatically at https://app.local.corva.ai:5000 (or a similar local URL) with a live preview of the scaffolded app.
Step 6: Enable the Corva UI MCP Server in Cursor (Optional)
If you use Cursor as your IDE, you can enable the Corva UI MCP server. This gives Cursor's AI assistant direct access to the @corva/ui component library — it can look up component docs, browse available hooks and utilities, search for components by use case, and retrieve API client documentation, all without leaving the editor.
What it provides
The MCP server exposes these capabilities to the AI agent:
- List all available
@corva/uiitems by category (components, hooks, utils, constants, clients, icons, etc.) - Search the component library by name or description
- Get documentation for individual components, hooks, API clients, theme tokens, and constants
How to enable it
Open Cursor Settings (gear icon or
Ctrl+Shift+J), then navigate to Tools & MCPs in the sidebar (or search for "MCP").Click New MCP server.
Set the server configuration as follows:
Edit the file ~/.cursor/mcp.json (global) or .cursor/mcp.json (per-project) with:
{
  "mcpServers": {
    "corva-ui": {
      "command": "npx",
      "args": ["-p", "@corva/ui", "corva-ui-mcp"]
    }
  }
}
- After saving, the server should appear under Installed MCP Servers with a green status indicator.
Once enabled, Cursor's AI agent can answer questions like "Which @corva/ui components handle loading states?" or "Show me the docs for the useSubscriptions hook" using live library data.
Troubleshooting
"Runtime 'ui' is not available locally"
This error typically appears when the installed Node.js version is higher than 24. Follow Step 1 to switch to Node 24 using NVM, then re-run the create-corva-app command.
node.exe not found after switching versions with NVM
Likely causes:
- A previous Node installation is still present — uninstall it and restart your terminal.
- PATH or NVM environment variables are not set correctly — rerun the NVM installer.
- The terminal was not restarted after installation — close and reopen
cmd.exe.
Yarn command not recognized in PowerShell
Run the execution-policy fix from Step 2:
Set-ExecutionPolicy -Scope CurrentUser -ExecutionPolicy RemoteSigned -Force
Then restart your terminal and try yarn -v again.
Useful NVM commands
nvm list              # Show installed Node versions
nvm install latest    # Install the latest Node version
nvm install 18.24.3  # Install a specific version
nvm use 24            # Switch to Node 24
nvm help              # Show all available commands
Summary
| Step | What you do |
|---|---|
| 1 | Install NVM for Windows and activate Node 24 |
| 2 | Install Yarn globally |
| 3 | Add app.local.corva.ai to the hosts file |
| 4 | Scaffold the app with @corva/create-app |
| 5 | Run yarn install and yarn start |
| 6 | (Optional) Enable the Corva UI MCP server in Cursor |
You're all set! Continue with the Getting Started guide to learn how to build out your front-end app, or explore the Component Library for available UI components.